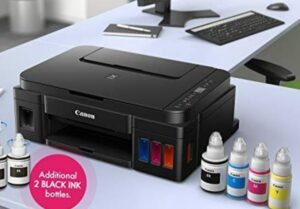
Canon G2012 Printer Driver Download

Canon G2012 Printer Driver Download
Driver Windows 10/8.1/7 (32-Bit/64-Bit) for Canon Pixma G2012 All-in-One Ink Tank Colour Printers
G2010 series Full Driver and Software Package for Microsoft Windows
Details: Functionality is All-in-One (Print, Scan, Copy). Pixma G Series Printer Output is Colour. Connectivity USB. Display – LCD (1.2 inch segment mono). Ideal usage for Home and Small office, Regular / Heavy usage more than 300 pages per month.
Common Canon G2010 Driver-Software Windows
This file will download and install the drivers, application or manual you need to set up the full functionality of your product.
Version: 1.0
File name: win-g2010-1_0-n_mcd.exe
Released: Jan 16, 2018
Operating Systems
Microsoft Windows 10 (32-bit), Windows 10 (64-bit), Windows 8.1 (32-bit), Windows 8.1 (64-bit), Windows 7 (64-bit)
Size: 17.98MB
Printer Driver Installation and Uninstallation Guides
How to Install Canon Printer Driver?
If you want to install Printer Driver now, please follow the step below:
- Canon Printer Driver installation process can be started when the download is complete, and you are ready to begin setting. The first step, click and open the directory where you store the downloaded file. The name of the printer driver files usually ends with.EXE extension.
- Click twice on the driver file, or you can right click on the file. It’s Up to you, then run as administrator and then wait a few minutes while the driver files from Canon Printer Driver are being extracted. After completion of file extraction is done, please follow the next installation steps.
- Installing the printer driver will start with setting Printer Driver software packages and do the following instructions displayed on the screen of the computer to complete the setup.
- After done to follow the instructions, your printing devices Printer Driver are ready to use.
How to uninstall Canon Printer Driver?
If you want to uninstall Printer Driver now, please follow the step below:
- Click on the start menu or press Microsoft button on your computer screen.
- Then find the control panel menu. If it had been found, just click on the icon control panel and select uninstall the program.
- See the list of installed applications, just select Type of Canon Printer Driver would you remove and click uninstall option.
- To complete the uninstall process, please wait a while until the Canon Printer Driver been removed. Then click the “Finish” option.
Note:
The steps for Canon Printer Driver Installation and Uninstallation Guides are tested for Operating System Windows XP, 7, 8. 8.1. This procedure of steps may be a little bit different to other OS.
If you think Article about Canon Printer Driver useful for many people, Please share for helping other.


