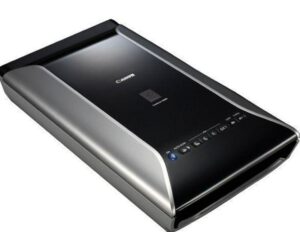
Download Canon CanoScan 9000F Mark II Scanner Driver for Windows 10/8.1/8/7/Vista/XP 32bit
9000F MarkII Scanner Driver Ver. 1.01 (Microsoft Windows)
Canon 9000F Mark II Scanner Driver for Windows
This file is a TWAIN-compliant scanner driver for Canon color image scanner. ‘You can install the following items of the software’ ScanGear: The TWAIN-compliant scanner driver for Canon color image scanner. IJ Scan Utility: The software that allows you to easily scan photos, documents, etc.
Version: 1.01
Name: mp68-win-9000fii-1_01-ea32_2.exe
Release date: 10 November 2017
Operating Systems: Windows 10 (32-bit), Windows 10 (64-bit), Windows 8.1 (32-bit), Windows 8.1 (64-bit), Windows 8 (32-bit), Windows 8 (64-bit), Windows 7 (32-bit), Windows 7 (64-bit), Windows Vista (32-bit), Windows Vista (64-bit), Windows XP (32-bit)
File Size: 12.01 MB
CanoScan LiDE 120 Scanner Driver for Windows
Version: 1.02
File Name: sc68-win-lide120-1_02-ea33_3.exe
Relased: Apr 13, 2016
Operating Systems: Windows 10, Windows 10×64, Windows 8.1, Windows 8.1×64, Windows 8, Windows 8×64, Windows 7, Windows 7×64, Windows Vista, Windows Vistax64, Windows XP
Size: 16.48MB
Printer Driver Installation and Uninstallation Guides
How to Install Canon Printer Driver?
If you want to install Printer Driver now, please follow the step below:
- Canon Printer Driver installation process can be started when the download is complete, and you are ready to begin setting. The first step, click and open the directory where you store the downloaded file. The name of the printer driver files usually ends with.EXE extension.
- Click twice on the driver file, or you can right click on the file. It’s Up to you, then run as administrator and then wait a few minutes while the driver files from Canon Printer Driver are being extracted. After completion of file extraction is done, please follow the next installation steps.
- Installing the printer driver will start with setting Printer Driver software packages and do the following instructions displayed on the screen of the computer to complete the setup.
- After done to follow the instructions, your printing devices Printer Driver are ready to use.
How to uninstall Canon Printer Driver?
If you want to uninstall Printer Driver now, please follow the step below:
- Click on the start menu or press Microsoft button on your computer screen.
- Then find the control panel menu. If it had been found, just click on the icon control panel and select uninstall the program.
- See the list of installed applications, just select Type of Canon Printer Driver would you remove and click uninstall option.
- To complete the uninstall process, please wait a while until the Canon Printer Driver been removed. Then click the “Finish” option.
Note:
The steps for Canon Printer Driver Installation and Uninstallation Guides are tested for Operating System Windows XP, 7, 8. 8.1. This procedure of steps may be a little bit different to other OS.
If you think Article about Canon Printer Driver useful for many people, Please share for helping other.


